

You can easily adjust the font sizes used in your Store Locator widget directly from the Customizer section of the Agile Store Locator plugin. This allows you to control the text appearance for titles, buttons, labels, and more.
Steps to Configure Font Sizes #
- Go to your WordPress Dashboard.
- Navigate to Agile Store Locator → ASL Settings → Customizer Tab.
- Click the Colors and Fonts button.
- This will redirect you to the Color and Font Customizer page.
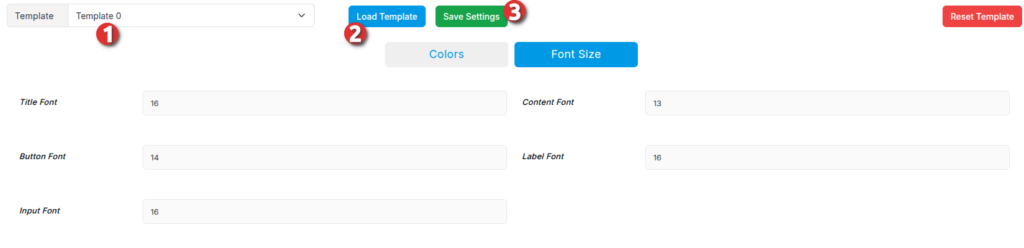
- From the dropdown menu, Select the template you’re currently using (e.g., Template 0, Template 2, etc.).
- Click on Load Template.
- The Colors and Fonts customization tabs will appear below.
- Click on the Font Size tab.
- Apply different font sizes as needed for each element.
Example Font Size Settings #
| Element | Recommended Font Size (px) |
|---|---|
| Title Font | 16 |
| Content Font | 13 |
| Button Font | 14 |
| Label Font | 16 |
| Input Font | 14 |
- Once you’ve set your preferred sizes, click the Save Settings button to apply the changes.
- Refresh the Store Locator page on your site to see the updated font sizes.
Resetting to Default #
If you ever want to revert your changes, click the Reset Template button.
This will restore all colors and font sizes to their default settings for the selected template.
Note #
It is recommended to use version 5.1.0 or above for access to the latest Customizer options and improved styling controls.


